
How to Unlock Fast Travel in Well Dweller
Unlock Well Dweller fast travel after The Swarm, find Tent Travel above Night Garden, and learn how to warp to visited tents from the map without a fee.
On this page+
To unlock fast travel in Well Dweller, defeat The Swarm in The Bog, take the Climb ability from the bird's nest to the right of its arena, and follow the upper route back toward Night Garden. Climb the high ledge there to collect Tent Travel. Afterward, open your map and select a tent you have already visited; you do not have to stand at another tent or pay to travel.
The route is documented by GameTyrant's release guide and a separate launch-week account. The steps below turn their directions into checkpoints you can compare with your own map. The game's current on-screen prompt decides which button to press.
Know which unlock you are looking for
There are two separate pickups in this sequence. Climb lets Glimmer scale the route out of The Swarm's area; Tent Travel is the later pickup that enables the map's warp action. Beating the boss is therefore a prerequisite, but the boss victory alone is not the moment fast travel becomes available. If your map still offers no travel action after the fight, continue through the newly accessible upper path before troubleshooting the menu.
The destination is also a separate concept. A tent becomes useful as a travel destination after you have found it, while Tent Travel gives you the ability to choose that destination from the map. These two conditions explain a common mismatch: the ability can be unlocked, yet a particular tent may still be absent because you have not visited it. A map marker showing where a tent exists is not a substitute for reaching it in your own save.
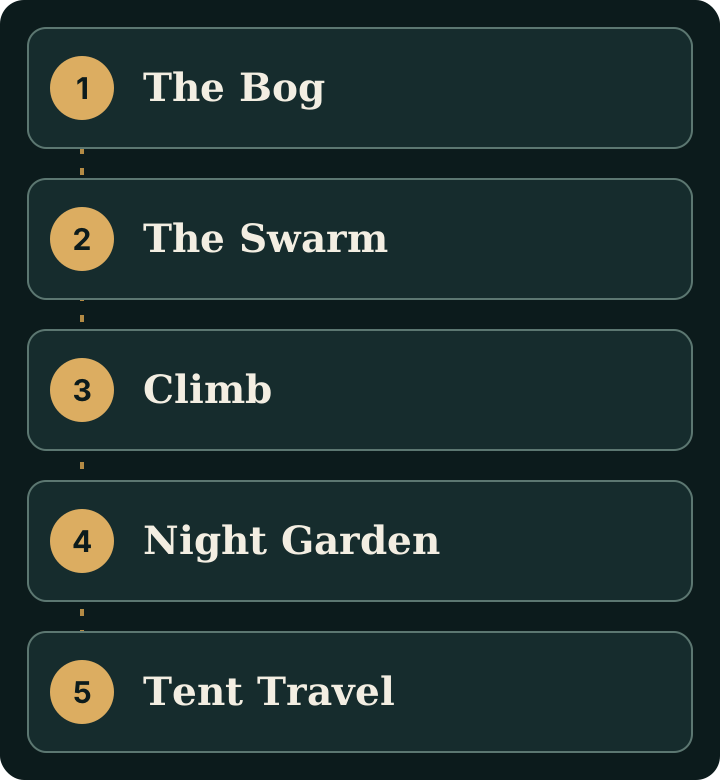
The landmarks in order are The Bog → The Swarm → bird's nest and Climb → upper Night Garden route → high ledge and Tent Travel. Use the map guide if you need a regional reference. Its external map can show the relevant tent or ability layer without displaying every collectible.
Reach the required boss without chasing the wrong marker
The Swarm is in The Bog, according to the two launch guides linked above. GameTyrant places the approach southeast of the initially locked Queen's Castle entrance. That landmark is more useful than simply searching for the word “fast travel”: at this stage, you are finding the fight that opens the climbing route, not collecting the travel pickup yet. If you are still near the castle gate, use the map to orient yourself toward the Bog path instead of repeatedly testing the gate.
The boss is a progression checkpoint. Reaching the right region without clearing the fight will not give you the Climb pickup beyond it. Identify the nearest tent before entering so retries have a clear return point.
GameTyrant calls The Swarm the second boss on its route, but use its name and area as your landmarks. Kyle Thompson explained that the game opens into multiple objectives after the introduction. If you took a detour, counting your personal boss encounters may mislead you.
Follow the route from Climb to Tent Travel
After The Swarm, go right from the arena and check the bird's nest. The release guide identifies that nest as the place to obtain Climb. Take it before leaving: the next part of the route asks you to scale a wall that was previously inaccessible. If you reach the wall but cannot ascend it, return to the nest and confirm that the ability pickup registered in your game.
Use Climb on the wall to the right, pass the short enemy section and look for the exit leading upward. The path loops back into Night Garden through an area you could not traverse earlier. At this point the map can be more helpful than a generic “go left” instruction: compare the room you have entered with the upper connection to Night Garden. If a lower path brings you back to familiar ground without the travel pickup, look for the higher exit and the climbable ledge.
The Tent Travel pickup is at the top of a steep rise on this return route, according to GameTyrant's walkthrough. Collect it before you start a long backtrack. The key distinction is that you climb after gaining Climb; simply returning to an old Night Garden tent does not grant the ability. When the pickup is collected, open your map and test it with a known tent before setting off for a distant objective.
The video chapters mark The Swarm at 25:40, Climb at 27:33 and Tent Travel at 29:09. Use those moments to check each landmark against the written route.
Use fast travel from the map
Once Tent Travel is unlocked, open the in-game map, move the selection to a tent you have already visited and use the travel action shown by your current controls. You can do this from elsewhere in the world; there is no need to walk to a tent first. A full-release player's account describes choosing any unlocked save point from the map, and GameTyrant explicitly reports that travel is free. Check your own on-screen prompt for the confirm button, because keyboard bindings and controller layouts differ.
Choose a tent near a shop, an unexplored branch or a previously blocked passage to shorten your next trip. Check the path from the tent to your objective before confirming; nearby map icons can sit on opposite sides of a locked entrance. Our interactive-map guide explains how to filter markers without revealing later-game spoilers.
If the travel option is missing
First, check whether you collected Tent Travel, not only Climb. The two pickups are close in the progression sequence but do different jobs. If you have Climb and can scale the return route, continue toward the high ledge in Night Garden. If you cannot scale the wall after the bird's nest, confirm the Climb pickup before searching the map for a travel command.
Second, check the destination itself. The map may show a tent as a point of interest before it is available to select in your save; travel is documented for previously visited tents. Try a tent you have personally reached and used, ideally the one you remember most clearly. If that works, your ability is functioning and the original target needs to be discovered on foot.
Finally, use the prompt shown in your version rather than an online button name. Move selection onto a visited tent and read the action legend; highlighting a marker is different from confirming travel. If the action still fails, note your platform and version when reporting the issue.
Sources and version
Checked September 23, 2026. The route comes from GameTyrant's September release guide, cross-checked against an independent beginner report and timestamped release footage. Map travel to visited tents is described by a release player and the demo's interface text; the latter confirms wording, not the released route. This guide does not claim an original full-release playthrough or reproduce another site's screenshots.
Continue exploring
Related guides
Well Dweller Map and Interactive Map Guide
Find a Well Dweller interactive map, use its markers without spoiling the game and plan return trips for tents, abilities, collectibles and blocked paths.
Well Dweller Platforms: PC, PS5, Xbox and Switch
Check Well Dweller's official PC, PlayStation, Xbox, Switch and Switch 2 listings, including Game Pass tiers, Switch 2 extras, and minimum PC requirements.
Well Dweller Achievements: 41 Goals and Checklist
Track Well Dweller's 41 Steam achievements with a spoiler-light plan for trinkets, spirits, story pages, combat and story goals, plus source notes.
Well Dweller Bosses: Fight Preparation and Guides
Prepare for Well Dweller bosses with a spoiler-aware method for reading attacks, choosing trinkets and using fight guides, starting with the Groundskeeper.